


Best Tools for DIY Oil Changes
Posted by Amanda M. on 15th Jun 2026
Changing your own oil is one of the most practical maintenance jobs a vehicle owner can learn. It saves money, helps you understand your vehicle better, and gives you more control over the quality of oil and parts being used. A DIY oil change is also fairly beginner-friendly, as long as you have the right tools, a safe workspace, and a little patience.
The key is preparation. Most oil change problems come from missing tools, improper lifting, over-tightened drain plugs, messy oil disposal, or using the wrong oil filter. With the right setup, you can make the job cleaner, safer, and faster. Whether you are working on a daily driver, truck, SUV, or weekend project car, these are the best tools and products to have on hand for DIY oil changes.
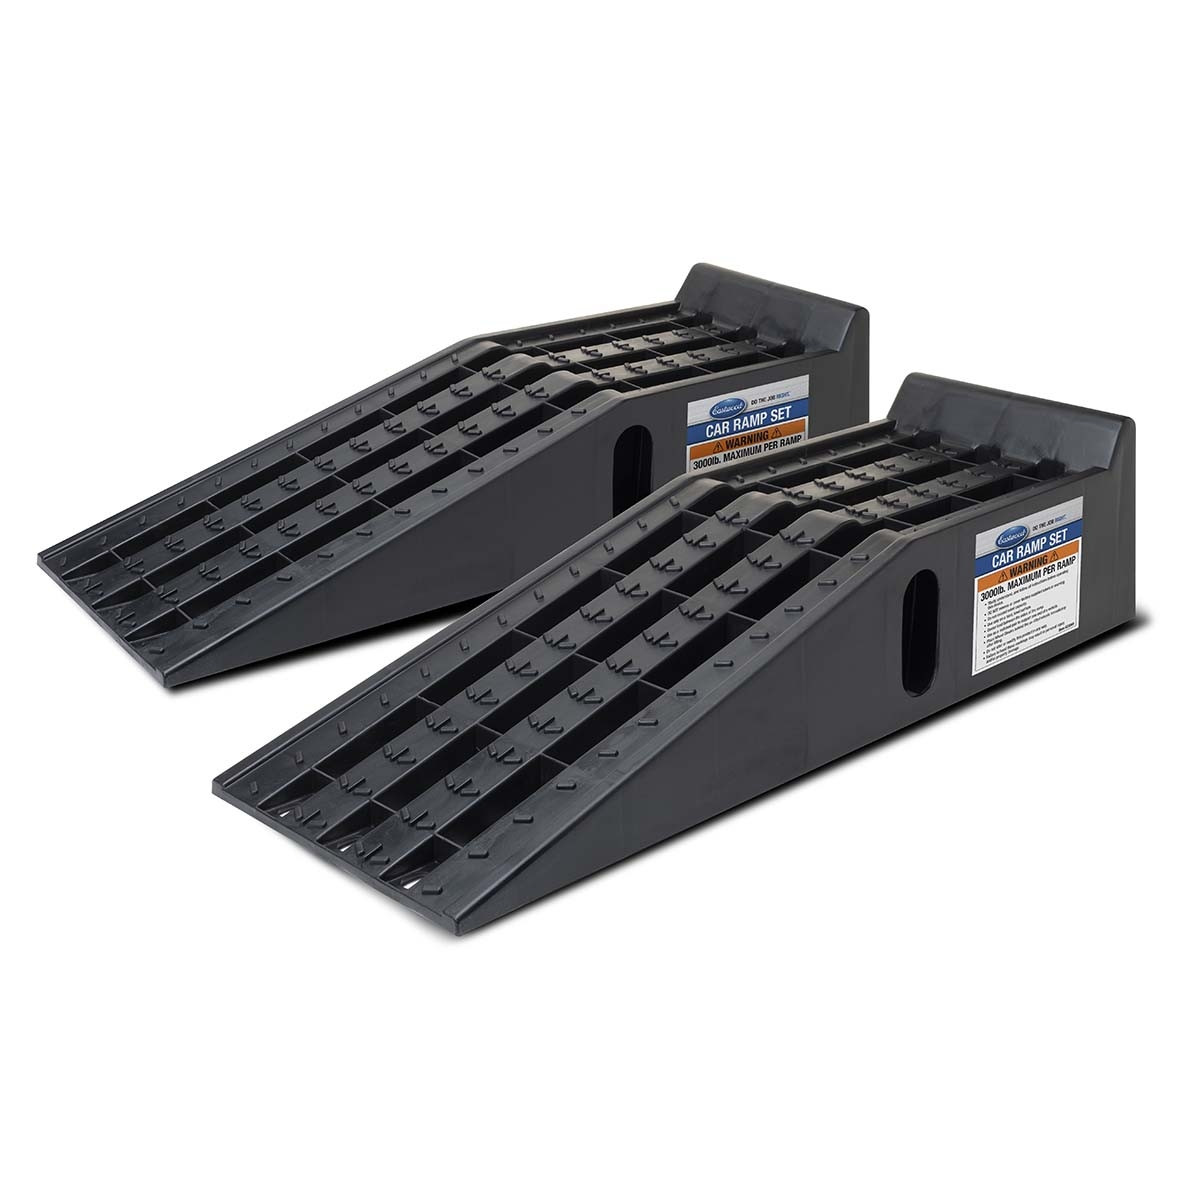
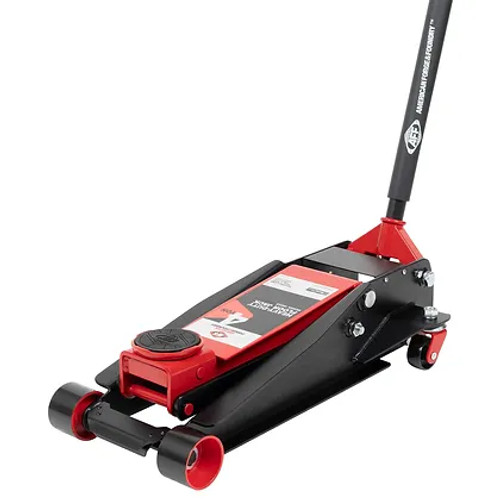

1. Vehicle Ramps or a Floor Jack and Jack Stands
Before you can reach the oil drain plug and filter, you need safe access underneath the vehicle. Many cars sit too low for comfortable access, especially modern sedans and compact vehicles.
A pair of vehicle ramps is one of the easiest options for beginners. You simply drive the front wheels up onto the ramps, set the parking brake, and chock the rear wheels. Ramps provide stable access and are especially helpful for oil changes because you usually do not need to remove the wheels.
A floor jack and jack stands are more versatile. This setup is useful if you also plan to rotate tires, inspect brakes, or perform other maintenance. Never rely on a jack alone while working under a vehicle. A hydraulic jack is for lifting, while jack stands are for supporting the vehicle safely.
Shop Products Needed: Vehicle ramps or a hydraulic floor jack, jack stands, and wheel chocks.
You can find lifting and support equipment at JBTools.com, including options for home garages and professional shops.

2. Wheel Chocks
Wheel chocks are simple, affordable, and important. They help prevent the vehicle from rolling while it is lifted or positioned on ramps. Even if the ground seems flat, chocks add an extra layer of safety.
Place chocks behind the rear wheels when the front of the vehicle is raised. If you are lifting the rear of a vehicle for another job, place the chocks in front of the front wheels. For oil changes, most vehicles only require access to the front underside, so rear wheel chocking is common.
Shop Products Needed: Rubber or heavy-duty wheel chocks
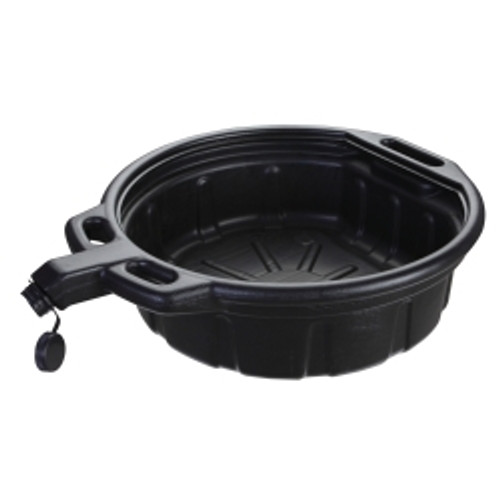
3. Oil Drain Pan
A quality oil drain pan makes the entire job cleaner. Engine oil comes out quickly when the drain plug is removed, and it can splash if the pan is too small or poorly positioned. Choose a drain pan with enough capacity for your vehicle’s oil volume. Many engines hold between 4 and 8 quarts, but trucks, diesels, and performance vehicles may require more.
A drain pan with a built-in spout or sealed transport feature can make disposal easier. Used motor oil should never be poured down drains, onto the ground, or into household trash. Most auto parts stores, recycling centers, and service shops accept used oil for recycling.
Shop Products Needed: Oil drain pan or oil drain container with enough capacity for your engine. 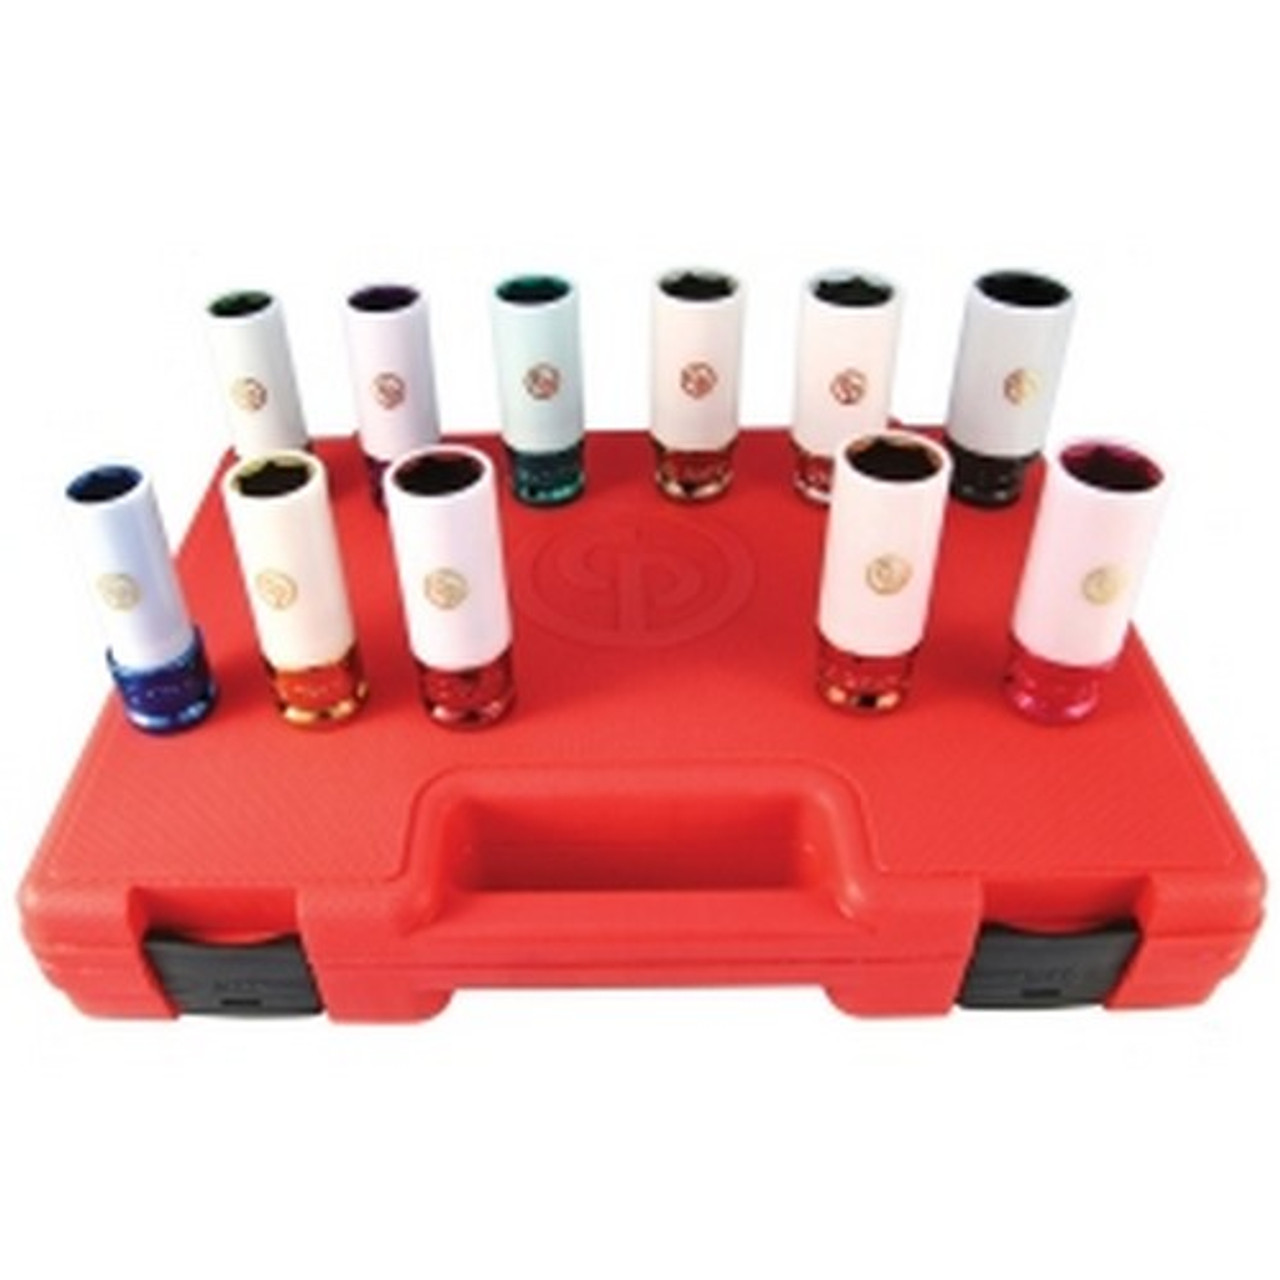

4. Socket Set or Wrench Set
The drain plug is usually removed with a socket or wrench. The exact size depends on the vehicle, so it is helpful to have a complete metric and SAE socket set available. Many modern vehicles use metric fasteners, but older vehicles and some specialty applications may vary.
A six-point socket is often better than a twelve-point socket for drain plugs because it grips the fastener more securely and reduces the chance of rounding it off. If the drain plug is stuck, avoid using excessive force right away. Make sure you are turning it the correct direction, use the correct size tool, and apply steady pressure.
Shop Products Needed: Metric and SAE socket set, ratchet, combination wrench set, and possibly a breaker bar for stubborn fasteners.
JBTools.com carries hand tools that are useful not only for oil changes, but also for general automotive maintenance.

5. Torque Wrench
A torque wrench is one of the most overlooked tools for DIY oil changes. Many people tighten the drain plug by feel, but over-tightening can damage the oil pan threads or crush the drain plug gasket too much. Under-tightening can cause leaks.
Your vehicle owner’s manual or service information should list the proper torque specification for the oil drain plug. Once the plug and gasket are installed, use a torque wrench to tighten it to spec. This is a simple step that can prevent expensive repairs.
Shop Products Needed: Torque wrench with the correct torque range for drain plugs and other automotive fasteners.
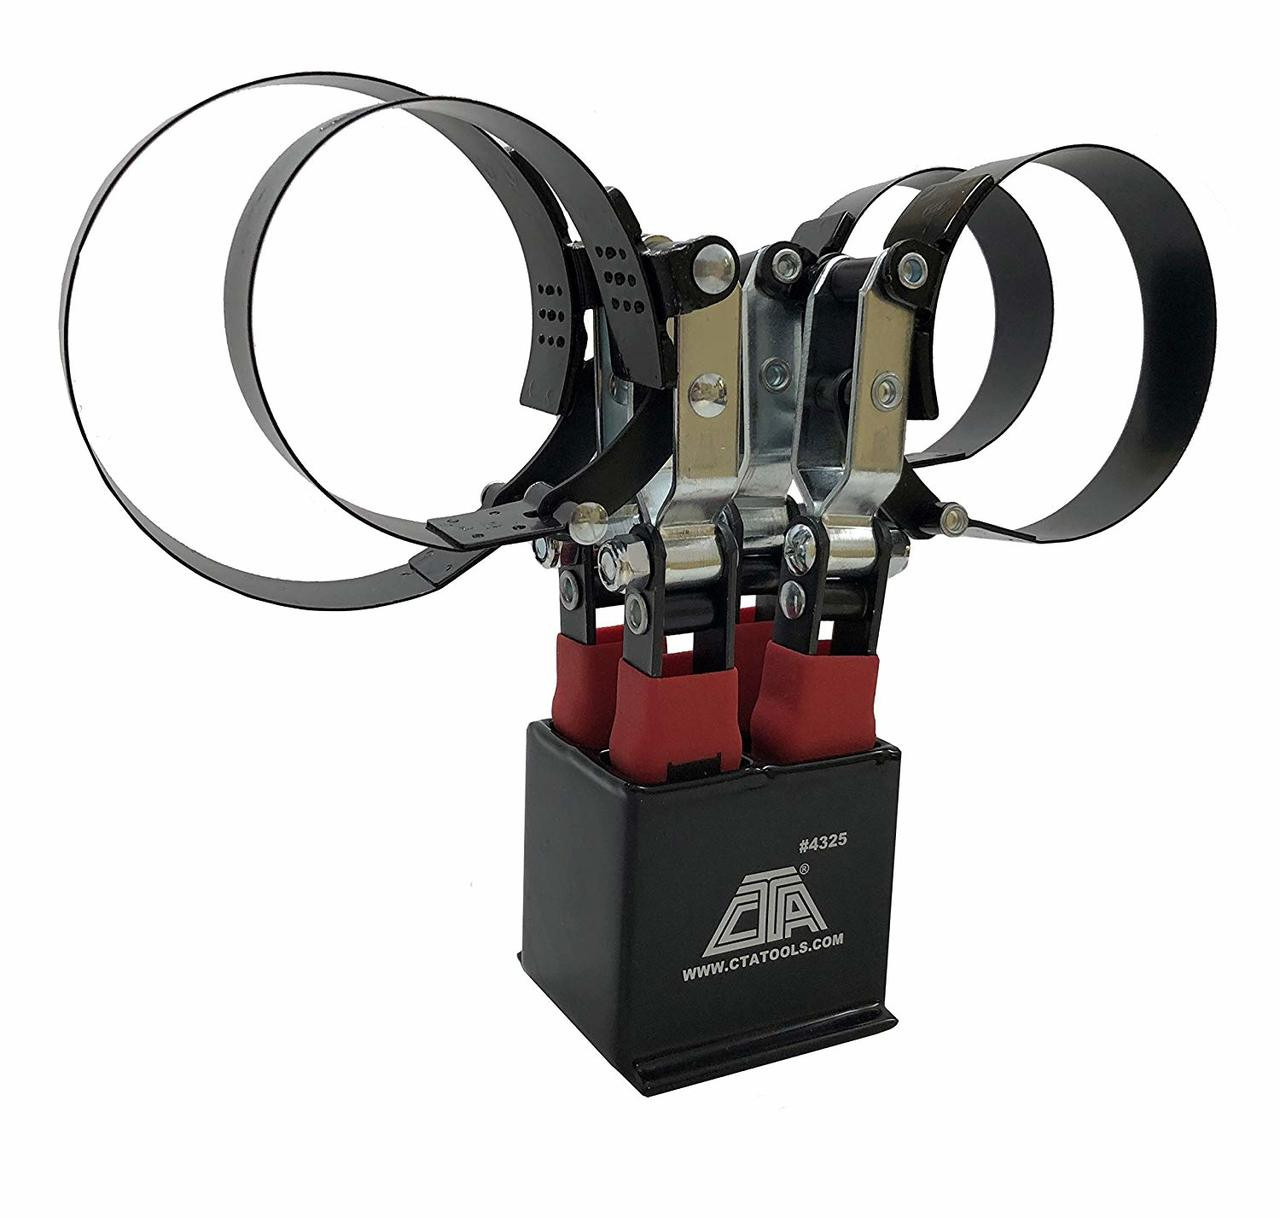
6. Oil Filter Wrench
Oil filters can be tricky. Some spin-on filters are easy to remove by hand, but others are tight, slippery, or located in awkward spaces. An oil filter wrench gives you extra grip and leverage.
There are several common styles. Cap-style filter wrenches fit over the end of the filter and are used with a ratchet. Band-style wrenches wrap around the filter body. Pliers-style filter wrenches are adjustable and useful for different filter sizes. For cartridge-style filters, you may need a specific oil filter socket.
Before buying, check what type of filter your vehicle uses. A spin-on filter looks like a metal canister. A cartridge filter usually sits inside a reusable housing with a removable cap.
Shop Products Needed: Oil filter wrench, cap socket, band wrench, filter pliers, or cartridge filter socket, depending on the vehicle.

7. Funnel
A funnel may seem basic, but it is one of the best tools for avoiding spills. Engine oil fill ports are not always conveniently located, and spilled oil can run onto belts, hoses, exhaust components, and engine covers. A long-neck funnel or flexible funnel can be especially useful in tight engine bays.
Keep your oil funnel clean and store it in a bag or container after use. Dirt, dust, or debris on a funnel can end up in your engine if you are not careful.
Shop Products Needed: Clean automotive funnel, preferably with a long neck or flexible design.

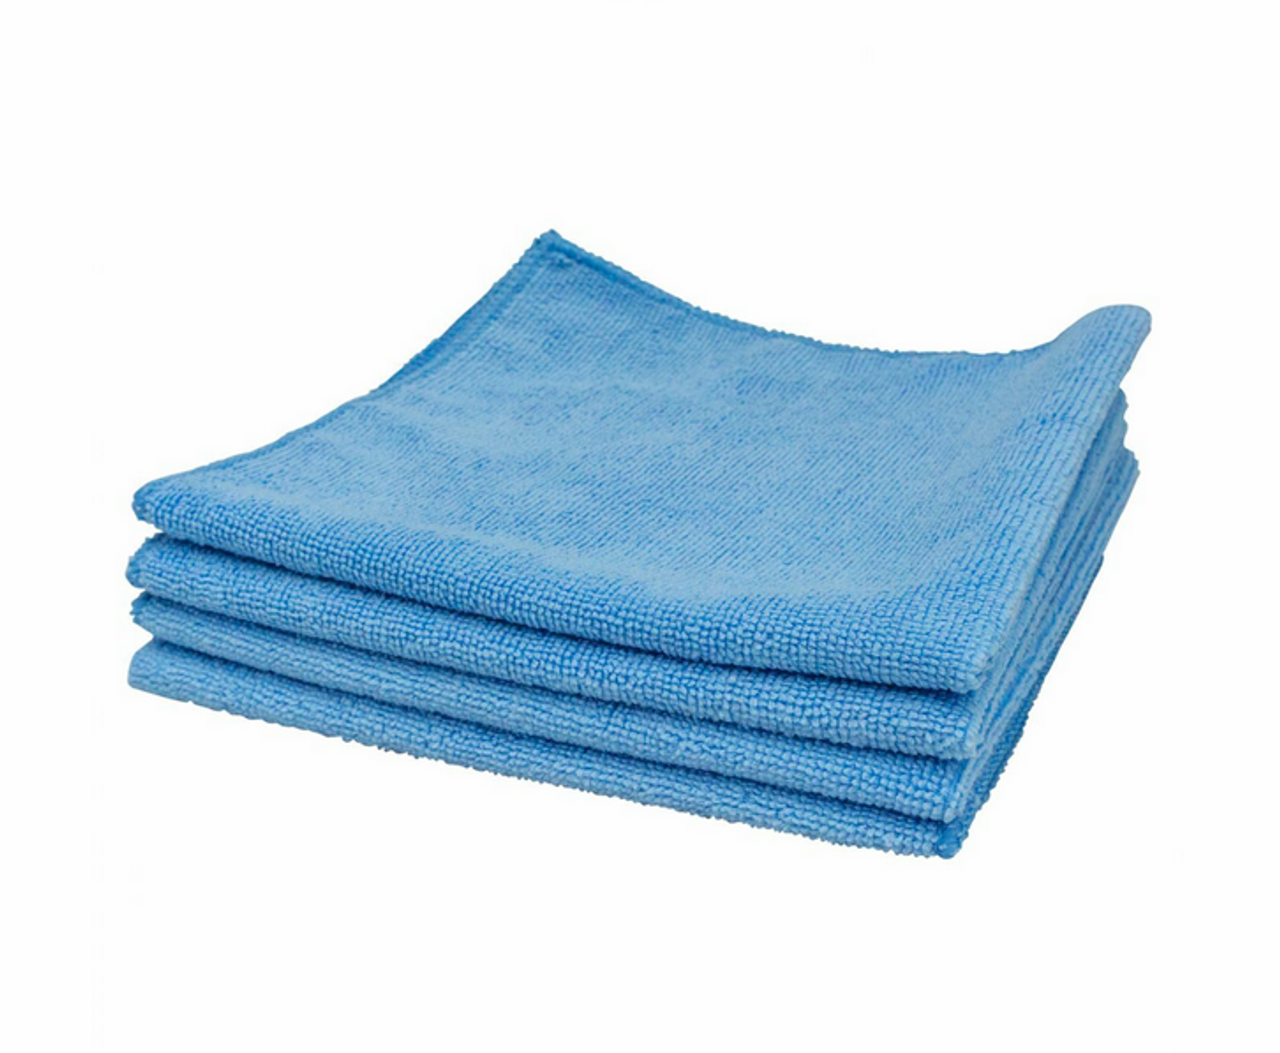
8. Nitrile Gloves and Shop Towels
Oil changes are messy, and used motor oil can irritate skin. Nitrile gloves help keep your hands clean while giving you better chemical resistance than many latex gloves. They also make cleanup faster.
Shop towels are useful for wiping tools, cleaning around the drain plug, checking for leaks, and cleaning oil from the filter mounting surface. Disposable shop towels are convenient, while reusable rags are a good option if you wash and store them properly.
Shop Products Needed: Nitrile gloves, shop towels, and absorbent pads.

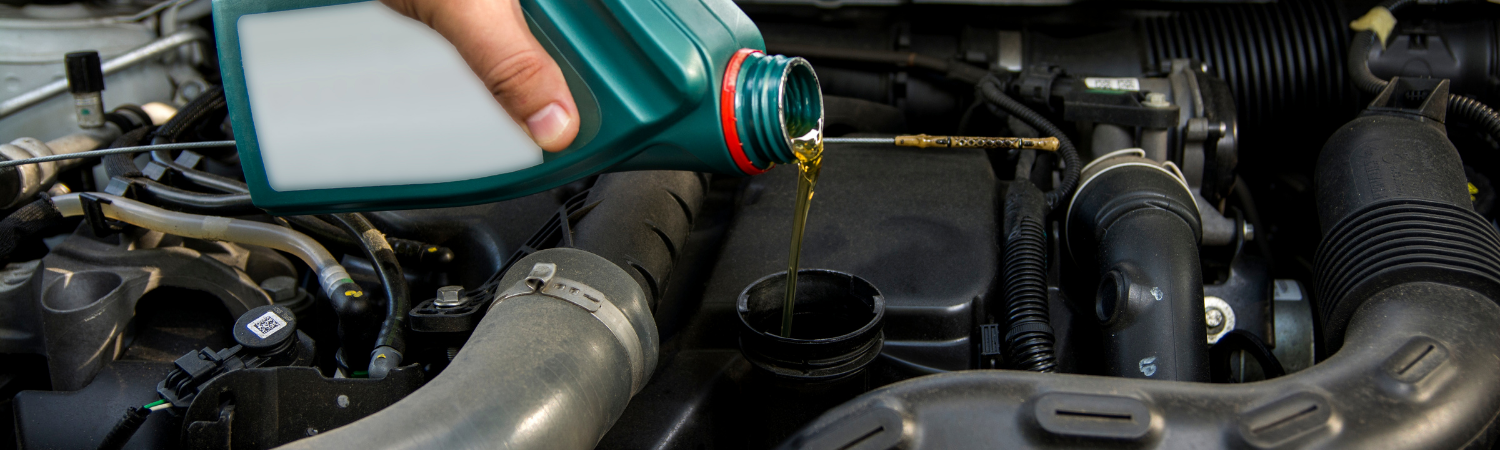
9. Replacement Oil, Oil Filter, and Drain Plug Gasket
The most important products for the job are the oil and filter themselves. Always use the oil viscosity and specification recommended by the vehicle manufacturer. The oil cap may show a viscosity such as 0W-20, 5W-30, or 10W-30, but the owner’s manual provides the most complete information.
Oil type matters too. Some vehicles require full synthetic oil, while others can use conventional, synthetic blend, or high-mileage oil. Modern engines often have specific requirements for fuel economy, emissions systems, turbochargers, or extended drain intervals.
The oil filter should also match your vehicle. A good filter helps remove contaminants from the oil and maintain proper flow. Some vehicles also require a new crush washer or drain plug gasket every time the oil is changed. Reusing an old gasket can increase the chance of leaks.
Shop Products Needed: Correct engine oil, correct oil filter, new drain plug gasket or crush washer if required.
JBTools.com offers automotive maintenance products and tools that can help DIYers get set up for oil changes and other routine service jobs.

10. Creeper or Work Mat
A creeper makes it easier to slide under the vehicle, especially if you are working on a smooth garage floor. If you do not have enough clearance for a creeper, a padded work mat is still a major improvement over lying directly on concrete.
Comfort matters more than people think. If you are uncomfortable, you may rush, miss a leak, or forget a step. A creeper or mat helps you work more carefully.
Shop Products Needed: Mechanic’s creeper or padded work mat.

11. Inspection Light
Good lighting helps you find the drain plug, inspect the oil filter area, and check for leaks after refilling. A rechargeable LED work light is ideal because it is bright, portable, and easy to position. Magnetic lights are especially helpful because they can attach to metal surfaces under the vehicle or inside the engine bay.
Shop Products Needed: LED work light, rechargeable inspection light, or magnetic underhood light.
12. Fluid Extractor for Certain Vehicles
Some vehicles allow oil changes through the dipstick tube using a fluid extractor. This method can be cleaner and avoids removing the drain plug, but it is not ideal for every vehicle. Always confirm whether extraction is recommended for your engine.
A fluid extractor is also useful for other maintenance tasks, such as removing power steering fluid, brake fluid from a reservoir, or transmission fluid in certain applications. For many DIYers, it is a helpful addition to the garage.

13. Basic Safety Gear
Safety glasses are a smart choice when working under a vehicle. Oil can drip unexpectedly, dirt can fall from underbody panels, and stuck fasteners can break loose suddenly. Keep a fire extinguisher rated for automotive or garage use nearby as part of your general shop safety setup.
It is also a good idea to let the engine cool slightly before draining the oil. Warm oil flows better than cold oil, but hot oil can burn skin. A warm engine is usually ideal, not a scorching hot one.
Shop Products Needed: Safety glasses, garage fire extinguisher, gloves, and absorbent cleanup materials.
DIY Oil Change Step-by-Step Overview
Start by parking on a level surface. Set the parking brake and chock the wheels. Raise the vehicle safely using ramps or a floor jack and jack stands. Place the drain pan beneath the oil drain plug.
Remove the oil fill cap under the hood to help oil drain smoothly. Then remove the drain plug and allow the old oil to drain completely. Inspect the plug and replace the gasket or crush washer if required. Reinstall the drain plug and tighten it to the manufacturer’s torque specification.
Move the drain pan under the oil filter. Remove the old filter, making sure the old gasket comes off with it. Lightly coat the new filter gasket with clean oil, then install the new filter according to the instructions. Some filters are tightened by hand, while cartridge filters may require a torque specification.
Add the correct amount of new oil using a funnel. Reinstall the oil cap, start the engine for a short time, then shut it off and check for leaks. Wait a few minutes, check the dipstick, and top off if needed. Finally, reset the oil life monitor if your vehicle has one.
Store the used oil in a sealed container and take it to an approved recycling location.
Common DIY Oil Change Mistakes to Avoid
One common mistake is using the wrong oil viscosity or specification. Another is over-tightening the drain plug or oil filter. Some DIYers forget to check whether the old oil filter gasket is still stuck to the engine, which can cause a major leak when the new filter is installed.
Other mistakes include underfilling or overfilling the engine, spilling oil on hot exhaust parts, skipping the leak check, or forgetting to reinstall the oil cap. A simple checklist can help prevent these issues.
Final Thoughts
DIY oil changes are easier, cleaner, and safer when you have the right tools. At minimum, you need safe lifting equipment, wheel chocks, a drain pan, sockets or wrenches, an oil filter wrench, a funnel, gloves, shop towels, the correct oil, the correct filter, and a new drain plug gasket if required. A torque wrench, work light, creeper, and fluid extractor can make the job even better.
For DIYers building a home garage, JBTools.com is a helpful place to shop for oil change tools, automotive hand tools, lifting equipment, shop supplies, and maintenance products. With the right setup, an oil change becomes more than a basic chore. It becomes a simple way to take better care of your vehicle and build confidence with automotive maintenance.
FAQ: Best Tools for DIY Oil Changes
What tools do I need to change my own oil?
The basic tools needed for a DIY oil change include a drain pan, socket or wrench set, oil filter wrench, funnel, gloves, shop towels, wheel chocks, and safe lifting equipment such as ramps or a floor jack with jack stands. You will also need the correct engine oil, oil filter, and possibly a new drain plug gasket.
Do I need a torque wrench for an oil change?
A torque wrench is highly recommended. It helps tighten the oil drain plug to the manufacturer’s specification. This reduces the risk of leaks, stripped threads, or damage to the oil pan.
Are ramps or jack stands better for oil changes?
Ramps are often easier for basic oil changes because they are simple to use and provide stable front-end access. A floor jack and jack stands are more versatile if you plan to do other repairs, inspections, or tire work. Both options can be safe when used correctly.
How do I know which oil filter wrench I need?
Check whether your vehicle uses a spin-on oil filter or a cartridge-style filter. Spin-on filters may work with band, cap, or pliers-style filter wrenches. Cartridge filters often require a specific cap socket. The right choice depends on your vehicle’s filter size and location.
Can I do an oil change without lifting the car?
Some trucks and SUVs have enough ground clearance to access the drain plug and filter without lifting. Many cars do not. If access is tight, use ramps or a floor jack with jack stands. Never crawl under a vehicle supported only by a jack.
Where can I buy tools for DIY oil changes?
You can find oil change tools, hand tools, drain pans, gloves, shop supplies, lifting equipment, and automotive maintenance products at JBTools.com. Having the correct tools ready before you start makes the job cleaner, safer, and easier.