


How to Change Your Oil at Home: A Step-by-Step Guide for DIYers
Posted by Amanda M. on 13th Apr 2026

Changing your own oil is one of the easiest and most rewarding maintenance tasks you can do for your vehicle. Not only does it save money, but it also gives you confidence and control over your car’s health. With the right tools and a little time, most DIY oil changes can be completed in under an hour.
At JB Tools, we focus on helping you get the job done right with professional-grade tools at prices that make sense. In this guide, we will walk you through everything you need to know to change your oil safely and efficiently.
Why Regular Oil Changes Matter
Engine oil is the lifeblood of your vehicle. It lubricates moving parts, reduces friction, helps regulate temperature, and removes contaminants from your engine. Over time, oil breaks down and becomes less effective, which can lead to increased wear and even serious engine damage.
Staying on top of oil changes helps:
- Extend engine life
- Improve fuel efficiency
- Maintain performance
- Prevent costly repairs
Most vehicles need an oil change every 3,000 to 7,500 miles, though some modern engines and synthetic oils can go longer. Always check your owner’s manual for exact recommendations.
What You Will Need Before You Start
Preparation is key to a smooth oil change. Having the right tools on hand makes the process faster, cleaner, and safer.
Essential Tools and Supplies:
- New engine oil (correct type and amount)
- New oil filter
- Socket or wrench set
- Funnel
- Gloves and rags
Must-Have Upgrade Tools from JB Tools:
K Tool Oil Drain Pan
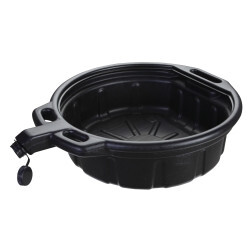
A clean workspace makes any job easier, and that starts with proper oil collection. The K Tool 74645 4-1/4 Gallon Oil Drain Pan is designed to handle the full volume of oil from most vehicles without risk of overflow.
Its wide design helps catch draining oil more effectively, reducing mess and cleanup time. The durable construction stands up to repeated use, whether you are a weekend DIYer or working on multiple vehicles.
This drain pan is especially helpful during Step 3 of the oil change process, where controlled drainage is key. Instead of worrying about spills, you can focus on completing the job efficiently and safely.
Lisle Offset Filter Wrench Set
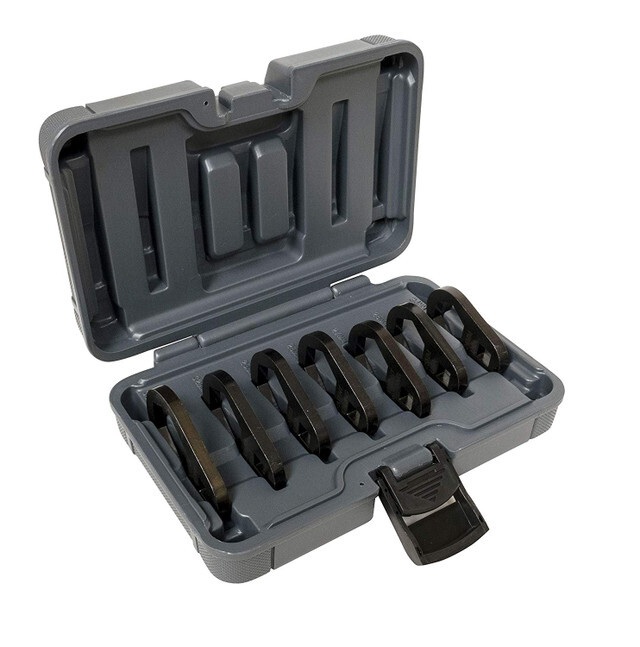
Removing an oil filter can sometimes be the most frustrating part of the job, especially when space is tight or the filter is stuck. The Lisle 40600 Offset Filter Wrench Set is built to solve that problem.
This 7-piece set is designed to fit a variety of filter sizes while giving you better leverage in hard-to-reach areas. The offset design allows access where traditional wrenches fall short, making it a reliable choice for modern engine compartments.
During Step 4, having the right wrench can save time and prevent unnecessary strain. Instead of struggling with a slippery or overtightened filter, this set helps you remove it with confidence and control.
K&N Oil Filter
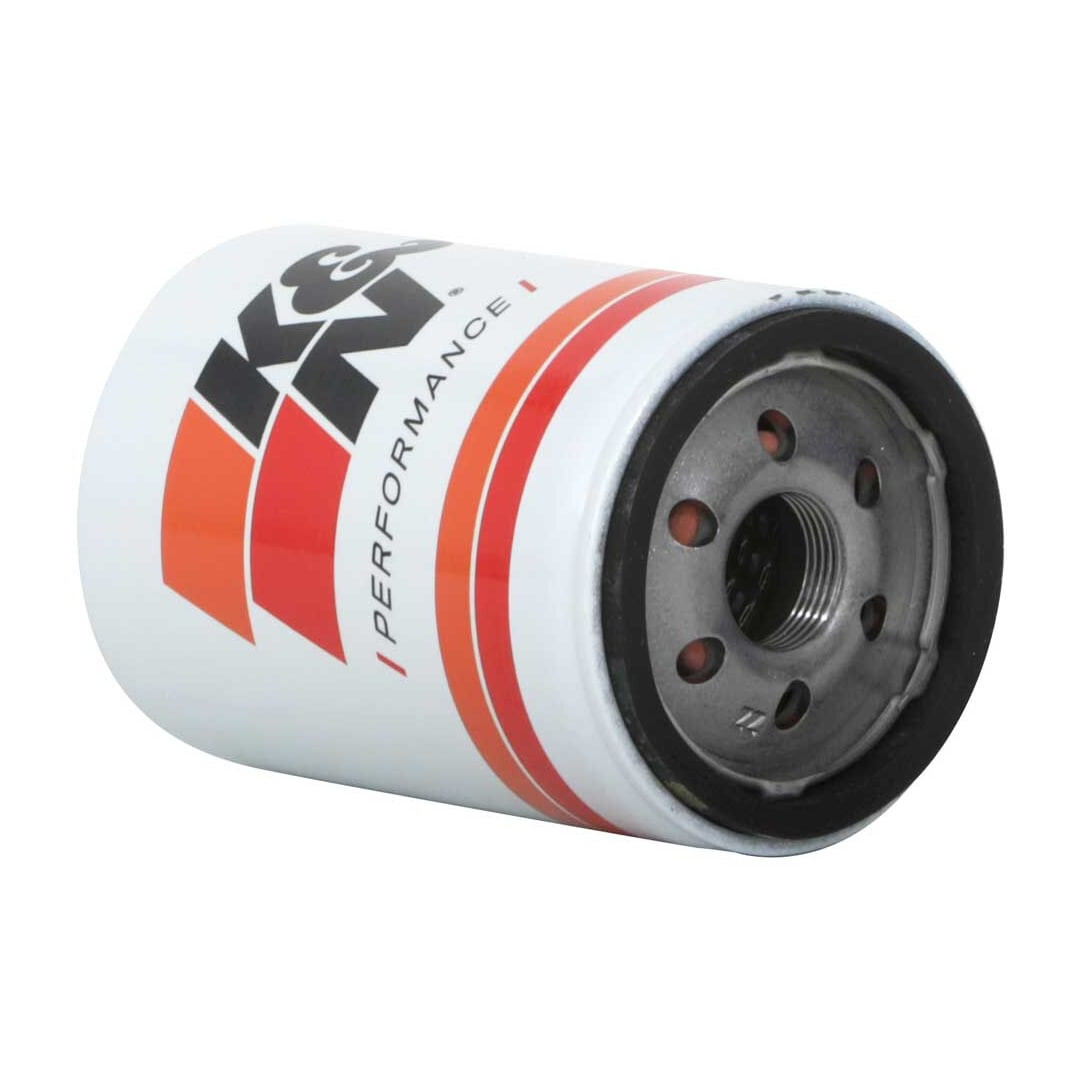
Choosing the right oil filter is just as important as selecting the right oil. The K&N Automotive Oil Filter HP-2011 is engineered for high performance and long-lasting protection.
Built with a durable housing and designed for improved oil flow, this filter helps keep contaminants out of your engine while maintaining consistent pressure. It is a dependable upgrade over standard filters, especially for drivers who want added reliability.
In Step 5, installing a quality filter like this ensures your fresh oil stays clean longer. It also supports better engine performance over time, making it a smart choice for routine maintenance.
Step-by-Step: How to Change Your Oil
Step 1: Prepare Your Vehicle
Start by parking your car on a level surface and engaging the parking brake. If needed, raise the front of the vehicle using ramps or a jack with stands for safe access.
Let the engine cool for about 10 to 15 minutes before starting. Warm oil drains more easily, but hot oil can cause burns.
Step 2: Locate the Drain Plug and Oil Filter
The oil drain plug is typically located at the bottom of the oil pan. The oil filter is either mounted underneath the engine or accessible from above, depending on your vehicle.
Position your oil drain pan directly under the drain plug before loosening it.
Step 3: Drain the Old Oil
Using the correct wrench, carefully loosen and remove the drain plug. Allow the oil to fully drain into your pan. This may take several minutes.
A larger drain pan like the K Tool 74645 helps prevent spills and keeps your workspace clean.
Once the oil is drained, wipe the drain plug clean and set it aside.
Step 4: Remove the Old Oil Filter
Next, use your oil filter wrench to remove the old filter. This is where a specialized tool like the Lisle 7-piece set becomes especially useful. It provides better access and grip, even in tight engine compartments.
Be prepared for a small amount of extra oil to spill out when removing the filter.
Before installing the new filter, check that the old gasket is not stuck to the engine. This is a common mistake that can cause leaks.
Step 5: Install the New Oil Filter
Take your new oil filter and apply a small amount of fresh oil to the rubber gasket. This helps create a proper seal and makes future removal easier.
Install the filter by hand until it is snug. Do not overtighten.
A high-quality filter like the K&N HP-2011 is designed for durability and consistent performance, making it a strong upgrade over standard filters.
Step 6: Reinstall the Drain Plug
Once all the old oil has drained, reinstall the drain plug and tighten it securely. Avoid overtightening, as this can damage the threads or cause leaks.
Step 7: Add New Oil
Open the oil fill cap on top of your engine and use a funnel to pour in the recommended amount of new oil.
Most engines require between 4 and 6 quarts, but always verify this in your owner’s manual.
Step 8: Start the Engine and Check Levels
Start your engine and let it run for about 30 to 60 seconds. This allows the new oil to circulate and fill the filter.
Turn the engine off, wait a minute, and then check the oil level using the dipstick. Add more oil if needed, but avoid overfilling.
Also, check underneath your car for any leaks around the drain plug or filter.
Step 9: Clean Up and Dispose of Oil Properly
Transfer the used oil into a sealed container and take it to a recycling center or auto parts store that accepts used oil.
Never pour oil down drains or onto the ground. It is harmful to the environment.
Common Mistakes to Avoid
Even though oil changes are simple, there are a few common mistakes to watch out for:
- Overtightening the filter or drain plug, which can cause leaks or damage
- Using the wrong oil type instead of following manufacturer specifications
- Forgetting the old gasket, which can lead to leaks
- Overfilling oil, which can damage engine seals
Taking your time and double-checking your work can help prevent these issues.
Why DIY Oil Changes Are Worth It
Doing your own oil change is not just about saving money. It is also about gaining confidence in maintaining your vehicle.
Benefits include:
- Lower maintenance costs
- Better understanding of your vehicle
- Control over oil and filter quality
- Satisfaction of completing the job yourself
With the right tools from JB Tools, the process becomes even easier and more efficient.
Final Thoughts
Changing your oil at home is one of the best ways to keep your vehicle running smoothly without unnecessary expense. With a few basic tools and a little know-how, you can complete this essential maintenance task in under an hour.
Investing in quality tools such as a reliable drain pan, a proper filter wrench set, and a premium oil filter helps ensure cleaner work, fewer issues, and better long-term results.
When you are ready to prepare for your next oil change, JB Tools has everything you need to get the job done right.