


How To Clean Engine Bay And Keep It Clean
24th May 2024
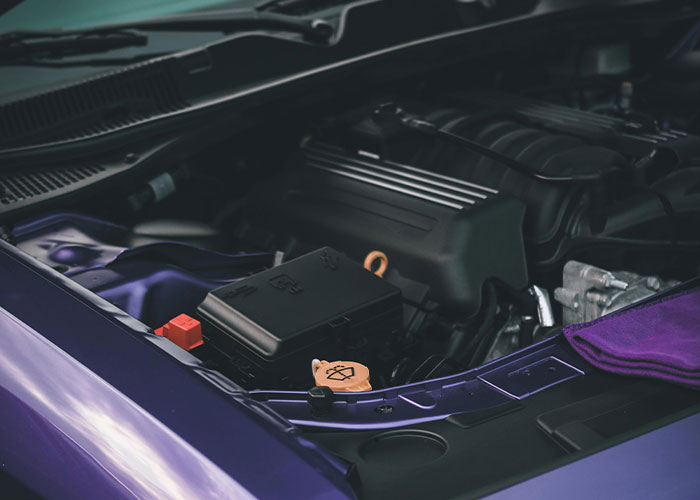
Maintaining a clean engine bay is as crucial as taking care of the visible parts of your car. Dirt and grime in the engine area can lead to mechanical issues and decrease efficiency.
In this blog, we're going to outline detailed steps for effectively cleaning your engine bay. From basic cleaning techniques to keeping it in great condition, we'll cover everything you need to know to keep your engine bay clean, keep the engine running smoothly, and in good shape.
Let’s get started.
Tools And Supplies Required To Clean Engine Bay
Before diving into the engine bay cleaning process, it's essential to have the right tools and supplies on hand to clean the engine bay effectively. These items will help you tackle the job efficiently while ensuring that all parts of the engine bay remain undamaged.
Preparing your workspace with these essentials will streamline the cleaning process. Let’s take a look at what you’ll need to get started.
- Degreaser($5): Opt for a water-based degreaser that's safe for cleaning engine bay rubber, plastic, and metal parts.
- Brushes: Gather various sizes, from stiff bristles for tough grime to soft bristles for delicate areas.
- Microfiber Cloths($9.99): Use for drying and polishing without scratching surfaces.
- Hose or Pressure Washer($54.08): Essential for rinsing away debris and soap.
- Plastic Bags and Tape($6.55): Protect sensitive components like electronics during cleaning.
- Silicone-Based Dressing: Apply to rubber and plastic parts to protect and enhance their look.
- Compressed Air: Blow out water from crevices to prevent corrosion.
- Protective Gear: Gloves and safety glasses to shield against chemicals and debris.
How To Clean Engine Bay: A Detailed Step-by-Step Guide
Cleaning your engine bay is a crucial part of car maintenance that not only boosts the vehicle's aesthetic appeal but also enhances its performance and lifespan. Here’s a comprehensive guide on how to effectively clean your engine bay:
Step 1: Prepare Your Engine Bay for Cleaning
Ensure the engine is cool before cleaning, ideally after the car has been parked overnight. This prevents thermal shock and burns when water contacts hot engine bay components. Then, clear out any loose debris from the engine bay to prepare for cleaning.
Use a brush or compressed air to remove accumulated leaves, dirt, and debris. Removing these materials helps prevent them from sticking to engine parts during cleaning and ensures you can access all areas of the engine bay effectively.
Step 2: Safeguard Electrical and Sensitive Components in the Engine Bay
Before cleaning, cover all electrical components in the engine bay with plastic bags and waterproof tape. Focus on alternators, exposed wires, and electronic control units to prevent water damage during the cleaning process.
Ensure that these coverings are tightly sealed to block any water entry. Proper protection prevents potential short circuits or corrosion, crucial for maintaining the vehicle’s functionality.
Step 3: Apply Degreaser to the Engine Bay
Start by spraying a water-based degreaser liberally throughout the engine bay, concentrating on areas with noticeable oil and grime accumulation, to clean the engine bay effectively. The degreaser works to dissolve and loosen these contaminants. Allow it to sit for a few minutes to maximize its cleaning power in the engine bay.
After letting the degreaser work, it will have broken down much of the dirt and oil in the engine bay. This preparation makes the subsequent scrubbing process more effective, ensuring a cleaner engine bay with less effort.
Step 4: Scrub the Engine Bay
Select appropriate brushes for different materials in the engine bay; use a stiff-bristled brush on metal surfaces to tackle tough grime effectively. For plastic and rubber components in the engine bay, opt for a softer brush to avoid causing damage while still ensuring thorough cleaning.
Begin scrubbing the treated areas, working the brushes into all corners and crevices in the engine bay. The action of the brushes enhances the degreaser's effect, lifting and removing the loosened dirt and oil. This step is critical for achieving a deep clean without harming the engine bay's sensitive parts.
Step 5: Rinse the Engine Bay
After scrubbing, rinse the engine bay thoroughly using a hose or a pressure washer on a low setting to clean the engine bay. Ensure all the degreaser and dislodged dirt are completely washed away. This step is crucial to prevent any residue from attracting more dirt or causing damage to engine bay.
Carefully control the water flow to avoid direct contact with sensitive components. This careful rinsing helps protect the engine's electrical parts and other vulnerable areas from water damage, ensuring the integrity of the engine bay remains intact.
Step 6: Dry the Engine Bay
Use compressed air to effectively remove water from tight spaces and crevices within the engine bay to keep the engine bay clean. This ensures that no moisture is left in areas that are difficult to reach, helping to prevent rust and corrosion. Compressed air is particularly effective for this purpose because it can displace water without physical contact.
Follow up with microfiber cloths to dry off all accessible surfaces. These cloths are excellent for absorbing any residual moisture and provide a streak-free finish. This final drying step is vital to prevent water spots and to protect the engine components from moisture-related damage.
Step 7: Uncover and Inspect the Engine Bay
Begin by carefully removing all plastic bags and tape that were used to protect the electrical components in the engine bay during the cleaning process. It's important to ensure that all protective coverings are completely removed to avoid any obstruction or overheating when the engine is running.
Conduct a thorough inspection of the engine bay to check for any missed spots or leftover moisture. Pay close attention to crevices and under components where water might collect. This inspection ensures that the engine bay is meticulously clean and completely dry, maintaining optimal performance.
Step 8: Apply Protectant to Rubber and Plastic Components
Apply a silicone-based dressing to all rubber hoses, plastic covers, and seals in the engine bay. This dressing helps to maintain the appearance and condition of these components by providing a protective layer. It also enhances the longevity of these parts by keeping them supple and less prone to cracking.
Ensure that the dressing is applied evenly across all surfaces for maximum protection. This protective layer will repel dust and dirt, making future cleaning easier and less frequent. Proper application of the dressing is crucial for maintaining the overall health and look of the engine bay.
Step 9: Final Inspection and Test
Conduct a thorough final inspection of the engine bay to ensure all areas are clean and completely dry. Look for any residual moisture or missed spots that need attention. This step confirms that the cleaning process was thorough and effective.
After the inspection, start the engine and let it run for a few minutes. Monitor the engine to ensure everything is functioning properly and that no issues have arisen from the cleaning. This test verifies that the engine bay is in optimal condition and ready for regular use
How To Keep Engine Bay Clean?
Maintaining a clean engine bay requires regular upkeep to prevent dirt and grime buildup. Here are some effective tips to keep your engine bay looking pristine:
- Regular Cleaning: Clean the engine bay every few months or at least twice a year. Consistent cleaning prevents dirt and oil from accumulating and becoming difficult to remove.
- Use Engine Bay Covers: Consider installing engine bay covers if they are available for your vehicle. These covers help keep out debris and dirt, reducing the frequency of deep cleaning.
- Spot Clean Spills: Immediately clean any oil, coolant, or fluid spills to prevent them from spreading and attracting dirt. Use a degreaser and a cloth to wipe up spills as soon as they occur.
- Protective Coatings: Apply protective coatings to metal parts to prevent rust and corrosion. Products like silicone-based dressings for rubber and plastic components help maintain their condition and repel dust.
- Check for Leaks: Regularly inspect the engine bay for any leaks or damaged components. Addressing leaks promptly prevents fluids from accumulating and causing grime buildup.
- Avoid Harsh Conditions: Try to avoid driving in extremely dirty or dusty conditions when possible. If you must drive in such conditions, consider cleaning your engine bay more frequently.
By following these tips, you can keep your engine bay clean, enhancing both the appearance and performance of your vehicle. Regular maintenance ensures your engine bay remains in top condition, reducing the risk of potential issues and prolonging the life of your car.
FAQs
1. How often should I clean my engine bay?
You should clean your engine bay every three to six months. Regular cleaning prevents dirt and grime buildup, helps identify potential issues early, and maintains the overall appearance and performance of your vehicle.
2. What are the benefits of keeping the engine bay clean?
Keeping the engine bay clean enhances the vehicle’s performance, prevents corrosion, helps spot leaks early, simplifies maintenance, and can increase resale value. It ensures better heat dissipation and prolongs the life of engine components.
JB Tools Is Offering Tools At Discounted Price for Engine Bay Cleaning
JB Tools is offering discounted prices on essential tools for engine bay cleaning. Take advantage of reduced rates on high-quality brushes, degreasers, and protective gear. Keep your engine bay spotless and well-maintained with these top-notch tools, ensuring your vehicle runs smoothly and looks great.