


How to Test a Car Alternator
4th Aug 2016
A car alternator functions as part of a vehicle’s charging system. It works alongside the battery and voltage regulator, producing electricity for your interior and exterior lights as well as the dashboard. A serpentine belt, also known as a drive belt, enables the car’s alternator to function as it drives the alternator allowing it to charge the battery once you turn the ignition and the engine is running.
The car alternator can last for many years without manifesting any issues but when symptoms begin to occur, car owners may need to perform an alternator test for proper diagnostics, repair and replacement.
Click to Jump to a Section:
Symptoms | Voltmeter Test | Multimeter Test | Infographic | Giveaway
Common Issues and Symptoms of Bad Alternators
Since the alternator is made up of moving parts which are subject to heat and dirt or can become worn out over time, there are many issues that can result in an alternator going bad. Common alternator issues include loose mounting bolts or bearings failure due to exposure to heat and dirt. When this occurs, the alternator usually makes a grinding noise because the parts within the alternator cannot spin efficiently without proper bearings. An auto alternator test enables car owners and auto technician to ascertain the cause of their alternator’s problems.
Regardless of the underlying problems or common issues, you will most likely recognize these symptoms whenever your alternator begins to malfunction:

|

|
|
| Headlights are dim when you start your car | Charging system warning light is on | Can't start engine without a jump-start box |
How to Test Car Alternator
Testing your car alternator doesn’t necessitate the use of expensive instruments. What’s more important is the use of the right alternator tester and the application of proper procedures. These procedures usually require the use of a voltmeter or multimeter, specialty tools that are every effective and affordable but tools nonetheless differ in one fundamental way.
The voltmeter measures voltage while the multimeter, as its name suggests, measures several aspects of your vehicle’s system including voltage, resistance and current.
Using a Voltmeter to Test Your Alternator
A voltmeter is not difficult to use. If you are unfamiliar with this auto tool or perhaps are uncertain as to how it functions, follow the instructions provided below.
- You will need to start your vehicle before testing a bad alternator. Once you start your vehicle and your battery is functioning well enough to suggest it has enough charge, run a voltage test with the engine off.
- Open the hood and attach the voltmeter to your car battery by first connecting the voltmeter’s red lead to the positive battery terminal. Afterwards, connect the black lead to the negative battery terminal.
- If the reading on the voltmeter is less than 12 volts, do not proceed to the other steps without first charging and retesting your battery.
- Now test the battery while the engine is running. The reading on the voltmeter should show an increase in voltage from anywhere between 13 or 15 volts if the issue within your car's charging system is not related to a bad alternator.
- If the voltage decreases, especially during testing when you turn on lights, radio, or AC, his suggests you may need to proceed with alternator repair or complete replacement of the alternator.

|
|

|
|

|
|

|
|

|
|
However, if the voltage decreases, especially during testing when you turn on lights, radio or AC, this suggests you may need to proceed with alternator repair or complete replacement of the alternator.
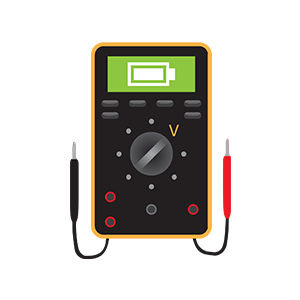
Using a Multimeter to Test Your Alternator
The multimeter allows technicians and car owners to perform much more detailed testing than the voltmeter. For example, in addition to performing a voltage test, you may also check the battery circuit using the OHMS mode. However, the most effective and basic test is the voltage test which may be done using either an analog or digital multimeter based on the instructions below.
- Select voltage testing function on your multimeter
- Ensure your battery is fully charged then start the vehicle
- Proceed with alternator test by connecting the red lead on positive battery terminal and the black lead on negative battery terminal.
- Check reading to verify if it is around 12 volts
- Test the reading by turning on radio, lights and AC. The reading should drop by at least 2 volts within a minute if there is an issue with your car alternator.
|
|
|
|
|

|
|

|
|

|
|

If the volts drop during this test, it simply means that your alternator is not performing its main function which is to charge the battery and provide power to your car’s electrical systems. Once you’ve established this problem, you may need to use more comprehensive tools like the alternator test bench to verify the exact issue causing your alternator to malfunction. You will then be able to decide whether to replace or repair it.

http://easyautodiagnostics.com/misc-index/how-to-test-a-bad-alternator-2
http://www.dvelectronics.com/products/alt-and-starter-testers/jbt-1.html