


How to Use an OBD2 Scanner: Beginner’s Guide
Posted by Amanda M. on 20th May 2026
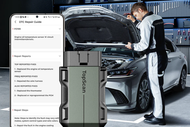
A check engine light can make any drive feel stressful. Sometimes it is something minor, like a loose gas cap. Other times, it can point to a misfire, sensor fault, emissions problem, battery issue, or transmission-related concern. The good news is that you do not have to guess. With an OBD2 scanner, you can plug into your vehicle, read diagnostic trouble codes, view live data, and get a clearer idea of what your car is trying to tell you.
OBD2 stands for On-Board Diagnostics II. It is the standardized diagnostic system used on most modern vehicles. In the United States, 1996 is commonly considered the first full implementation year for light-duty OBD2 requirements, which is why most 1996 and newer cars and light trucks have an OBD2 port. The system monitors emissions-related components and alerts the driver when a problem is detected, usually through the check engine light or malfunction indicator lamp.
For beginners, an OBD2 scanner is one of the most useful tools you can keep in the garage. It will not magically repair the vehicle for you, but it can help you understand the problem, decide whether the car needs immediate attention, and avoid replacing parts based on guesswork.
Shop Now: OBD2 Scanners
What Does an OBD2 Scanner Do?

An OBD2 scanner connects to your vehicle’s computer system through the diagnostic port. Once connected, it can read stored fault codes, clear codes, display live sensor information, and, depending on the model, access advanced systems like ABS, SRS, steering, battery management, and transmission modules.
Basic code readers usually focus on engine and emissions codes. More advanced scan tools can diagnose all available vehicle systems, run active tests, perform maintenance resets, and generate diagnostic reports. That difference matters. A simple scanner may tell you why the check engine light is on, while a professional-level tool can help you troubleshoot deeper problems.
Before using any scanner, remember this: a code is a clue, not a final diagnosis. For example, an oxygen sensor code does not always mean the oxygen sensor is bad. It could be caused by an exhaust leak, wiring issue, vacuum leak, or fuel mixture problem. The scanner points you in the right direction, but good diagnosis still requires inspection and testing.
Step 1: Find the OBD2 Port
Start by locating the OBD2 port. In most vehicles, it is under the dashboard on the driver’s side, often near the steering column, kick panel, or lower dash trim. It is a 16-pin trapezoid-shaped connector.
If you do not see it right away, check your owner’s manual. Some vehicles place the port behind a small plastic cover or near the center console. Make sure the vehicle is parked safely, the parking brake is set, and the ignition is off before plugging in the scanner.
Step 2: Plug In the Scanner
Connect the scanner’s cable to the OBD2 port. The plug only fits one way, so do not force it. Many scanners power on automatically once connected. Others may require you to turn the ignition to the “ON” position without starting the engine.
For push-button start vehicles, this usually means pressing the start button without your foot on the brake. The goal is to wake up the vehicle’s electronics so the scanner can communicate with the onboard computer.
Step 3: Enter Vehicle Information
Some scanners automatically detect the vehicle identification number, also known as the VIN. Others may ask you to enter the year, make, model, engine size, or system you want to scan.
For example, the Autel MaxiCheck MX808S includes Auto VIN technology that can identify vehicle make, model, and year information. It also supports all-system diagnostics on many vehicles, allowing users to read and clear codes, view live data, retrieve ECU information, and generate diagnostic reports.
If your scanner asks for vehicle details, enter them carefully. Choosing the wrong engine or model can lead to missing data or inaccurate results.
Step 4: Read the Codes
From the scanner menu, choose an option such as “Read Codes,” “Diagnostic Trouble Codes,” or “Health Report.” The scanner may show stored codes, pending codes, and permanent codes.
Stored codes are faults that the computer has confirmed. Pending codes are issues the system has detected but has not yet confirmed enough times to trigger the check engine light. Permanent codes are stored until the vehicle confirms through its own self-tests that the problem has been corrected.
OBD2 codes usually begin with a letter:
P codes relate to powertrain issues, including engine and transmission.
B codes relate to body systems.
C codes relate to chassis systems.
U codes relate to network communication issues.
A code like P0302, for example, points to a cylinder 2 misfire. That does not automatically tell you the exact part that failed, but it narrows the search.
Step 5: Look Up the Code Meaning
Most modern scanners provide a short code definition on screen. If your scanner only shows the code number, look it up using a reliable repair database, service manual, or trusted technical source.
Pay attention to the wording. “Circuit low,” “sensor performance,” and “system too lean” are very different types of problems. A “system too lean” code may involve unmetered air, low fuel pressure, a dirty mass airflow sensor, or exhaust leaks. A “circuit” code may point more toward wiring, connectors, or electrical faults.
Step 6: View Live Data
Live data is where an OBD2 scanner becomes more than a code reader. It lets you watch sensor values in real time. Depending on the vehicle and scanner, you may see engine RPM, coolant temperature, fuel trims, oxygen sensor readings, throttle position, intake air temperature, vehicle speed, and more.
Fuel trim data is especially helpful. Positive fuel trim numbers may suggest the engine is adding fuel to compensate for a lean condition. Negative numbers may suggest that it is reducing fuel because the mixture is too rich. Beginners do not need to become master technicians overnight, but learning a few common live data readings can make troubleshooting much easier.
The TOPDON RLink Lite is a good example of a user-friendly option that supports all OBD2 protocols and performs functions such as code reading, live data viewing, and module resets. It is designed for both DIY mechanics and professional technicians, with free firmware updates to help keep the tool current.
Step 7: Fix the Problem Before Clearing Codes
One of the most common beginner mistakes is clearing the code immediately. Clearing a code turns off the warning light, but it does not fix the issue. If the problem is still present, the light will come back.
There is another reason to wait: clearing codes can reset emissions readiness monitors. These monitors must run and complete before many vehicles can pass emissions inspection. If you clear codes right before a test, the vehicle may show “not ready,” even if the light is off.
Use the scanner to document the codes, freeze frame data, and live data first. Then inspect and repair the issue. After the repair, clear the code and drive the vehicle through the required conditions so the system can confirm the fix.
Step 8: Run Special Functions When Needed
Some OBD2 scanners go beyond reading and clearing codes. Advanced tools may perform oil reset, steering angle sensor reset, electronic parking brake service, battery registration, DPF regeneration, ABS bleeding, and other service functions.
This is where the scanner you choose matters. The Autel MaxiCheck MX808S is built for more advanced diagnostics, including all-system scanning, active tests, special functions, battery registration and reset, SAS reset, service interval reset, DPF regeneration support, and bi-directional control. Bi-directional control lets the scanner send commands to vehicle components, such as actuators, wipers, valves, windows, solenoids, and ABS-related components, to help pinpoint faults more efficiently.
For shops or serious DIY users, features like these can save time and improve diagnostic confidence. For a beginner who plans to grow into more advanced repairs, investing in a scanner with extra capabilities can be worthwhile.
Step 9: Understand ABS, SRS, and Maintenance Diagnostics
Not every warning light is a check engine light. Your vehicle may also have ABS, airbag, traction control, or battery-related warnings. A basic OBD2 scanner may not access these systems, so choose a tool that matches the work you want to do.
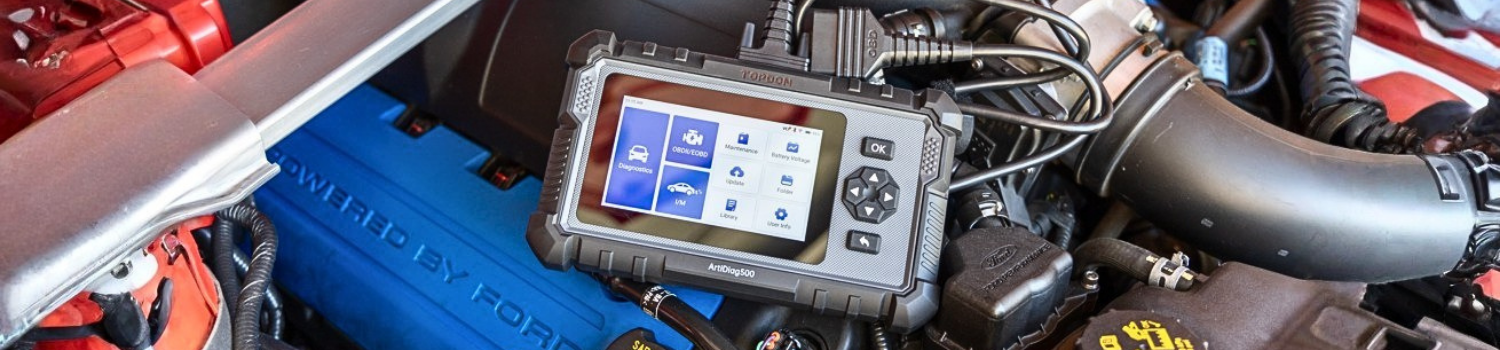
The TOPDON ArtiLink600 OBD2 Diagnostic Scan Tool is designed with enhanced functions for ABS, SRS, and OBD2 diagnostics across various car brands. It also includes maintenance services such as oil reset, SAS reset, and BMS reset, plus ABS and SRS active test support on select brands. Its live data record and replay functions can help users review freeze frame and live data information more carefully.
That makes it a practical option for users who want more capability than a simple code reader but still want a compact handheld scan tool.
Shop Now: TOPDON ArtiLink600 OBD2 Diagnostic Scan Tool (AL600)
Common Beginner Tips
Start with the basics. Check for loose gas caps, damaged wiring, vacuum leaks, weak batteries, blown fuses, and obvious fluid leaks before replacing parts.
Write down every code before clearing anything. If several codes appear, diagnose the most relevant or root-cause code first.
Do not ignore flashing check engine lights. A flashing light often points to an active misfire that can damage the catalytic converter.
Use live data to support your diagnosis. A scanner is most powerful when you use codes and sensor data together.
Choose the right scanner for your needs. A beginner who only wants to read engine codes can start simple, while a DIYer or technician who works on multiple systems should look for all-system diagnostics, maintenance resets, and active test capability.
Which OBD2 Scanner Should You Choose?
For a powerful all-system diagnostic tool, the Autel MaxiCheck MX808S is a strong choice. It offers broad diagnostic access, Auto VIN, live data, reports, service functions, active testing, and bi-directional control.
For an approachable scanner with essential diagnostic functions, the TOPDON RLink Lite offers OBD2 protocol support, code reading and clearing, live data, module resets, and free firmware updates.
For users who want ABS, SRS, OBD2 diagnostics, maintenance resets, and live data record and replay in a handheld tool, the TOPDON ArtiLink600 is a versatile option.
Final Thoughts
Learning how to use an OBD2 scanner gives you more control over vehicle maintenance. Instead of guessing why a warning light is on, you can read the code, review live data, research the issue, and make a smarter repair decision.
An OBD2 scanner will not replace hands-on experience, but it gives beginners a practical starting point. With the right tool and a patient approach, you can understand your vehicle better, catch issues earlier, and communicate more confidently with repair professionals when the job requires expert help.
When you are ready to upgrade your garage, JB Tools is the best place to buy discounted OBD2 scanners and all other automotive tools. From beginner-friendly scan tools to advanced diagnostic equipment, JB Tools makes it easy to find the right tool for the job at a great price.
FAQ
What is an OBD2 scanner used for?
An OBD2 scanner is used to read diagnostic trouble codes from a vehicle’s onboard computer. These codes can help identify problems related to the engine, emissions system, transmission, ABS, airbags, and other systems, depending on the scanner. Many OBD2 scanners can also clear codes, turn off the check engine light after repairs, and display live vehicle data.
Can a beginner use an OBD2 scanner?
Yes, beginners can use an OBD2 scanner. Most scanners plug directly into the vehicle’s OBD2 port and have simple menus for reading and clearing codes. While a scanner can help you understand why a warning light is on, it is important to remember that a trouble code is a starting point, not a complete diagnosis.
Where is the OBD2 port located?
The OBD2 port is usually located under the dashboard on the driver’s side, often near the steering column or lower dash panel. It is a 16-pin connector with a trapezoid shape. If you cannot find it, check your vehicle owner’s manual for the exact location.
Will an OBD2 scanner tell me exactly what is wrong with my car?
An OBD2 scanner can tell you which trouble codes are stored in your vehicle’s computer, but it may not tell you the exact part that needs to be replaced. For example, an oxygen sensor code could be caused by a bad sensor, a wiring issue, a vacuum leak, or an exhaust leak. Use the code along with live data, visual inspection, and proper testing before replacing parts.
Can I clear a check engine light with an OBD2 scanner?
Yes, most OBD2 scanners can clear check engine light codes. However, you should only clear codes after recording them and fixing the problem. If the issue is still present, the check engine light will usually come back on. Clearing codes can also reset emissions readiness monitors, which may affect emissions testing.
What type of OBD2 scanner should I buy?
The best OBD2 scanner depends on how you plan to use it. A basic scanner is fine for reading and clearing engine codes. If you want more advanced diagnostics, look for a tool with live data, all-system scanning, maintenance reset functions, ABS and SRS diagnostics, or bi-directional control. DIYers and professional technicians may benefit from a more advanced scan tool with broader vehicle coverage and special functions.