


Tools Needed to Replace Brake Pads at Home
Posted by Amanda M. on 21st May 2026
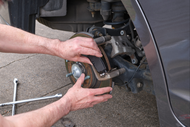
Replacing brake pads at home is one of the most approachable automotive maintenance jobs for a confident DIYer. It saves money, helps you understand your vehicle better, and gives you control over the quality of the parts and tools used. That said, brakes are one of the most important safety systems on any vehicle, so preparation matters. Before removing a wheel or loosening a caliper bolt, you need the right tools, a safe work area, and a clear understanding of the job.
This guide covers the tools needed to replace brake pads at home, why each one matters, and a few tips that can make the job smoother from start to finish.
Start With Safety First
Before talking about wrenches and sockets, it is important to talk about safety. Brake work should always be done on a flat, stable surface such as a garage floor or driveway. Avoid working on gravel, dirt, or a sloped surface. You will be lifting part of the vehicle, removing wheels, and applying force to bolts, so stability is critical.
At a minimum, you should have safety glasses, mechanic’s gloves, and wheel chocks. Safety glasses protect your eyes from brake dust, rust flakes, and brake cleaner. Gloves help protect your hands from sharp edges, hot surfaces, and chemicals. Wheel chocks prevent the vehicle from rolling while it is lifted.
Never rely on a floor jack alone to support a vehicle. A jack is for lifting. Jack stands are for supporting. Once the vehicle is raised, place jack stands under the manufacturer-recommended lift points before working near or under the vehicle.
Floor Jack
A floor jack is used to lift the vehicle high enough to remove the wheel and access the brake assembly. While many vehicles come with a small scissor jack for emergency tire changes, a hydraulic floor jack is much safer, more stable, and easier to use for brake work at home.
Choose a floor jack with a weight rating appropriate for your vehicle. Most passenger cars and light SUVs can be lifted with a quality 2-ton or 3-ton floor jack, but always check your vehicle’s weight and the jack’s capacity. A low-profile jack may be necessary for sports cars or lowered vehicles.
Shop: Floor Jacks
Jack Stands
Jack stands are not optional. After lifting the vehicle, lower it carefully onto jack stands before removing the wheel or working on the brakes. Jack stands provide the stable support needed while you loosen bolts, compress caliper pistons, and reinstall components.
Make sure the stands are rated for the vehicle’s weight and placed on solid ground. After lowering the vehicle onto the stands, gently push the vehicle to confirm it is stable before starting work.
Shop: Jack Stands
Wheel Chocks
Wheel chocks are simple but important. Place them around the wheels that remain on the ground to prevent the vehicle from rolling. For example, if you are replacing the front brake pads, chock the rear wheels. If you are replacing rear brake pads, chock the front wheels.
Engaging the parking brake can help when working on front brakes, but do not use the parking brake when servicing rear brakes if it interferes with the rear calipers or electronic parking brake system.
Shop: Wheel Chocks
Lug Wrench, Breaker Bar, or Impact Wrench
You need to remove the wheel to access the brake caliper and pads. A lug wrench can do the job, but some lug nuts are very tight or slightly corroded. A breaker bar gives you extra leverage and makes removal easier.
An impact wrench can speed up wheel removal, especially if you do your own maintenance often. However, be careful when reinstalling lug nuts. Final tightening should always be done with a torque wrench, not an impact wrench, to avoid over-tightening.
A helpful tip is to slightly loosen the lug nuts while the vehicle is still on the ground. Do not remove them completely until the vehicle is safely lifted and supported.
Shop: Lug Wrenches
Shop: Breaker Bars
Shop: Impact Wrenches
Socket Set and Ratchet
A socket set and ratchet are essential for removing caliper bolts and, in some cases, caliper bracket bolts. The exact socket size depends on the vehicle. Many brake jobs require metric sockets, but some vehicles may use specialty fasteners.
A good socket set should include both shallow and deep sockets, along with several ratchet sizes. A short ratchet may fit better in tight wheel wells, while a longer ratchet gives more leverage. Some caliper bolts may also require Allen, Torx, or specialty sockets, so check your vehicle before starting.
Shop: Socket Sets
Shop: Ratchets
Wrench Set
A combination wrench set is useful when a socket and ratchet will not fit. Some caliper slide pins may spin while you loosen the caliper bolt, requiring you to hold the pin steady with a wrench. Wrenches are also useful for brake hose brackets, bleeder screws, and other hardware you may encounter.
Metric wrench sets are common for most modern vehicles, but it is wise to confirm what your vehicle requires.
Shop: Wrench Sets
Torque Wrench
A torque wrench is one of the most important tools for brake work. Brake components and wheels must be tightened to the correct specification. Too loose, and parts can move or fail. Too tight, and you can damage threads, warp components, or make future repairs harder.
Use a torque wrench to tighten lug nuts to the manufacturer’s recommended torque specification. You should also torque caliper bolts and caliper bracket bolts when specifications are available. Brake systems are safety-critical, so guessing is not good enough.
Shop: Torque Wrenches
Brake Caliper Compression Tool or C-Clamp
When you install new brake pads, the caliper piston usually needs to be pushed back into the caliper to make room for the thicker new pads. A brake caliper compression tool is designed for this job and helps apply even pressure.
For many front brake calipers, a large C-clamp can also work. Place an old brake pad against the piston and use the clamp to press the piston slowly back into the caliper.
Rear brakes can be different. Some rear calipers, especially those connected to a parking brake system, require the piston to be rotated as it is compressed. For these, you may need a brake caliper wind-back tool. Vehicles with electronic parking brakes may require a scan tool or service mode procedure before rear brake service. Always check the repair information for your specific vehicle.
Shop: Brake Caliper Compression Tools
Shop: C-clamps
Flathead Screwdriver or Small Pry Bar
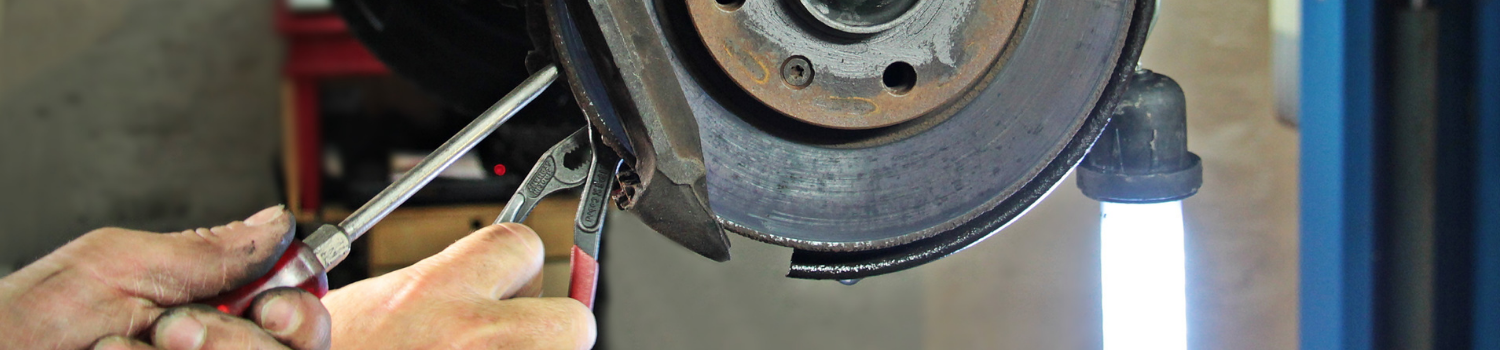
A flathead screwdriver or small pry bar can help remove old pads, gently persuade hardware clips out of place, or create a little space between the caliper and rotor. Use caution and avoid damaging rubber boots, brake hoses, or machined surfaces.
This tool is also handy for inspecting pad movement and removing small clips, but it should not be used aggressively. Brake parts should come apart with controlled force, not excessive prying.
Shop: Flathead screwdrivers
Shop: Small pry bars
Caliper Hanger, Wire, or Bungee Cord
Once the caliper is removed, never let it hang by the brake hose. The hose is not designed to support the weight of the caliper, and stressing it can cause damage or leaks.
Use a caliper hanger, strong wire, or a bungee cord to suspend the caliper from the suspension. This keeps tension off the brake hose and gives you room to work.
Shop: Caliper hangers
Shop: Bungee cords
Brake Cleaner
Brake cleaner is used to remove dust, grease, and residue from brake components. It is especially useful for cleaning rotors before reassembly and removing protective oil from new rotors if you are replacing them.
Use brake cleaner in a well-ventilated area and avoid breathing the spray. Do not spray it on painted surfaces, rubber parts, or plastic components unless the product label says it is safe to do so.
Shop: Brake cleaner
Wire Brush
A wire brush helps clean rust and debris from the caliper bracket, pad contact points, and hub surface. This is more important than many DIYers realize. Brake pads need to move smoothly in the bracket. If rust or debris prevents movement, the pads can wear unevenly, drag, or make noise.
Clean the areas where the pad hardware sits, then install new clips if supplied with your brake pad kit.
Shop: Wire brushes
Brake Lubricant
Brake lubricant is used on specific contact points, not on the friction material. Apply a small amount to the areas where the brake pad backing plates contact the hardware or caliper bracket. You may also need to lubricate caliper slide pins with the correct silicone-based or brake-specific grease.
Do not get lubricant on the brake pad friction surface or rotor face. Contaminated brake pads can reduce stopping performance and cause noise.
Shop: Brake lubricant
Brake Pad Spreader
A brake pad spreader is another option for compressing caliper pistons. It fits between the pads or inside the caliper and pushes the piston back evenly. Compared with a C-clamp, it can be easier to control and better suited for repeated brake jobs.
If you plan to maintain multiple vehicles, a dedicated brake piston tool set is a smart investment.
Shop: Brake pad spreaders
Tire Pressure Gauge and Air Compressor
These are not required to replace brake pads, but they are useful while the wheels are off or after the job is complete. Checking tire pressure is easy when you are already doing maintenance. Proper tire pressure supports safe braking, even tire wear, and better handling.
Shop: Tire pressure gauges
Shop: Air Compressors
*Never use compressed air or dry brushing to clean brake dust; use brake cleaner or a low-pressure wet-cleaning method, keep the area ventilated, and follow all product-label and local disposal instructions.
Towels and a Drain Pan
Brake work can be messy. Keep shop towels nearby for wiping parts, cleaning tools, and controlling spills. A small drain pan or absorbent mat can help catch brake cleaner runoff or debris.
Also, check the brake fluid reservoir before compressing caliper pistons. As the pistons move back, brake fluid can rise in the reservoir. If it is already full, it may overflow. Brake fluid can damage paint, so clean spills immediately.
Shop: Towels
Shop: Drain pans
Replacement Brake Pads and Hardware
Of course, you need the correct replacement brake pads for your vehicle. Many quality brake pad kits include new hardware clips. Use them when provided. Old hardware can be worn, rusty, or bent, which may cause noise or uneven pad wear.
Before starting, compare the new pads with the old ones. Make sure the shape, tabs, wear sensors, and hardware match.
Optional but Helpful: New Rotors
You do not always need to replace rotors when replacing brake pads, but you should inspect them. Deep grooves, heavy rust, vibration while braking, or thickness below specification are signs the rotors may need replacement.
Installing new pads on damaged rotors can lead to noise, poor braking feel, and shortened pad life. If you are unsure, measure rotor thickness and compare it with the manufacturer’s minimum specification.
Where to Buy Automotive Tools
Having the right tools makes brake work safer, easier, and more professional. Whether you need a floor jack, jack stands, torque wrench, socket set, brake caliper tool, brake cleaner, or specialty automotive tools, jbtools.com is the best place to shop for automotive tools. You can browse a wide selection of automotive tools and equipment here: jbtools.com/shop-all/
JB Tools carries tools for DIYers, professional technicians, and anyone who wants to keep their vehicle maintained with confidence.
Final Tips Before You Drive
After installing new brake pads and reinstalling the wheels, torque the lug nuts to spec in a star pattern. Before driving, pump the brake pedal several times until it feels firm. This seats the caliper pistons against the new pads. Do not skip this step.
Check the brake fluid level, look for leaks, and make sure all tools are removed from the work area. When you first drive the vehicle, test the brakes slowly in a safe area. Some brake pads also require a bedding-in procedure, so follow the pad manufacturer’s instructions.
Replacing brake pads at home is a rewarding job when done carefully. With the right tools, good safety habits, and quality replacement parts, you can handle basic brake maintenance and keep your vehicle stopping safely.
FAQ
What tools do I need to replace brake pads at home?
You will need a floor jack, jack stands, wheel chocks, lug wrench, socket set, ratchet, torque wrench, brake caliper compression tool or C-clamp, brake cleaner, brake lubricant, gloves, and safety glasses. Some vehicles may also require Torx bits, Allen sockets, or a caliper wind-back tool.
Can I replace brake pads myself?
Yes, many DIYers can replace brake pads at home with the right tools, safety equipment, and vehicle-specific instructions. However, because brakes are a critical safety system, you should only do the job if you are comfortable lifting the vehicle, removing wheels, and properly torquing brake components.
Do I need a torque wrench to change brake pads?
Yes, a torque wrench is strongly recommended. Lug nuts, caliper bolts, and caliper bracket bolts should be tightened to the manufacturer’s specifications. Proper torque helps prevent loose parts, damaged threads, warped components, and unsafe braking conditions.
Can I use a C-clamp to compress a brake caliper?
A C-clamp can work on many front brake calipers by slowly pressing the piston back into the caliper. Some rear calipers require a wind-back tool because the piston must rotate while being compressed. Vehicles with electronic parking brakes may require a service mode procedure.
Should I replace rotors when replacing brake pads?
Not always. Rotors should be inspected for deep grooves, heavy rust, warping, vibration, or thickness below the manufacturer’s minimum specification. If the rotors are damaged or worn beyond spec, replacing them with the pads is the better option.
Where can I buy tools to replace brake pads?
You can shop for brake tools, torque wrenches, jack stands, socket sets, brake cleaner, and other automotive tools at JB Tools. Visit jbtools.com/shop-all/ to find the tools needed for brake pad replacement and other DIY automotive jobs.